It’s time to install in your Bebonia clip-in extensions! Get ready to instantly transform your curls in a few simple steps. Check out the video below or scroll down for a step-by-step guide.
How To Clip In Curly Clip In Hair Extension
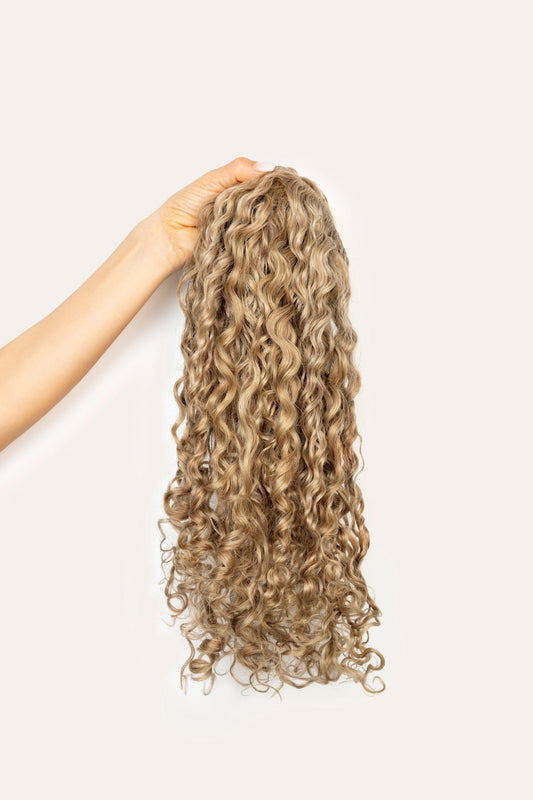
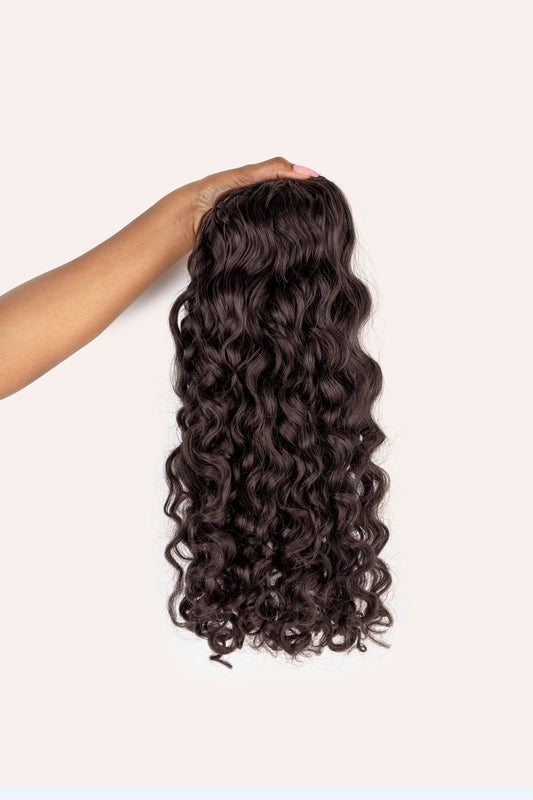
If you’ve purchased a 110g set of clip-in extensions for hair, you will receive 6 wefts. The 220g set, contains 9 wefts. The above demo uses a Curly, Dark Brown, 22'', 220g set of curly clip-in hair extensions.
What You'll Need:
- Your full set of Bebonia clip-in extensions
- A spray bottle filled with water
- A clip to section your hair
- Mirror
Note: Before you begin this process make sure you’ve washed and styled your curls to your liking. You should have also washed and set your clip-in extensions. Your clip-in extensions must be dry before you begin!
How to Install a 110g Set of Clip-In Hair Extensions
Step 1: Start from the bottom.
You’ll need: One 3-clip weft

We always start by clipping the hair extensions from the nape of the neck and moving upwards. To create your first section, use your index fingers to separate a small section of hair out, making sure to create an even part. The section should be long enough in width that the weft lines up with it perfectly, end to end. Secure the rest of your hair away with a clip.
Secure the width to the center of the section, starting with the middle clip. You should secure it as close to the root as possible. Once the middle clip has been clipped in, clip the left side and then the right, pulling the weft taught.
Pro tip: To make it easier and prevent clip sliding, pull the hair slightly away from your scalp to create leverage. You can also tease the hair to create a more secure base.
Step 2: Start your next section.
You’ll need: One 3-clip weft

Create your next section by creating a new straight part about half an inch above the first clipped weft. Secure excess hair away with a clip.

Take your next three-clip weft, and make sure it fits within the section. Secure by clipping in the middle clips, then the sides.
Pro Tip: To avoid bumps in the weft, slightly stretch the piece at the sides when you’re securing middle clips.
Step 3: Halfway there!
You’ll need: Two 4-clip wefts

Create your next part and section about half an inch above your last weft, clipping away excess hair. This should be along the widest portion of your head. Clip away excess hair.

You’re going to install two 4-clip curly extension wefts in this section. Secure the first from the middle of your head and pull it towards the left side of your face. Clip your two center clips in the middle of your section, and then secure the side clips.

Then, place the edge of your next weft beside the one you just installed. You want to clip across your entire head, without leaving gaps between the wefts. This weft should sit in line or just above the first 4-clip weft. Drag this weft from the center of your head towards the right hand side. Secure in place by clipping your two center clips in the middle of your section, and then secure the side clips.
Step 4: The Finish Line!
You’ll need: Two 2-clip wefts

Create your final section, about an inch above your latest weft. Your last wefts go on the sides of your hair to boost volume and ensure a seamless blend front to back.

Separate a straight thin section of hair about two inches above the ear on the side, and clip the rest of the hair away. Take a 2-clip weft and secure the clip closest to your hairline first. Then secure the second clip closer to the back of your head. Repeat on the other side.
Release your remaining hair and you’re good to go!
 __________________________________________________________________
Is Your Hair Super Thick?
Check out this video for some additional tips on blending clip-in hair extensions with thick hair.

How to blend curly hair extensions with thick hair
How to Install a 220g Set of Clip-In Hair Extensions
Step 1: Start from the bottom.
You’ll need: One 3-clip weft
We always start by clipping from the nape of the neck and moving upwards. To create your first section, use your index fingers to separate a small section of hair out, making sure to create an even part. The section should be long enough in width that the weft lines up with it perfectly, end to end. Secure the rest of your hair away with a clip.
Secure the width to the center of the section, starting with the middle clip. You should secure it as close to the root as possible. Once the middle clip has been clipped in, clip the left side and then the right, pulling the weft taught.
Pro tip: To make it easier and prevent clip sliding, pull the hair slightly away from your scalp to create leverage. You can also tease the hair to create a more secure base.
Step 2: Start row 2!
You’ll need: One 3-clip weft
Create your next section by creating a new straight part about half an inch above the first clipped weft. Secure excess hair away with a clip.
Take your next three-clip weft, and make sure it fits within the section. Secure by clipping in the middle clips, then the sides.
Pro Tip: To avoid bumps in the weft, slightly stretch the piece at the sides when you’re securing middle clips.
Step 3: Start row 3
You’ll need: One 3-clip weft
Create your next section by creating a new straight part about half an inch above the last clipped weft. Secure excess hair away with a clip.
Take your next three-clip weft, and make sure it fits within the section. Secure by clipping in the middle clips, then the sides.
Step 4: Your first double row (aka row 4!)
You’ll need: Two 3-clip wefts
Create your next part and section about half an inch above your last weft, clipping away excess hair. Clip away excess hair.
You’re going to install two 3-clip wefts in this section. Secure the first from the middle of your head and pull it towards the left side of your face. Clip your two center clips in the middle of your section, and then secure the side clips.
Place the edge of your next weft beside the one you just installed. You want to clip across your entire head, without leaving gaps between the wefts. This weft should sit in line or just above the first 3-clip weft. Drag this weft from the center of your head towards the right hand side. Secure in place by clipping your two center clips in the middle of your section, and then secure the side clips.
Step 5: Your second double row (aka row 5!)
You’ll need: Two 4-clip wefts
Repeat the same process as Step 4, this time with two 4-clip wefts. This section should sit at the widest part of your head.
Step 6: The Finish Line!
You’ll need: Four 2-clip wefts
Create your final section, about an inch above your latest weft. Your last wefts go on the sides of your hair to boost volume and ensure a seamless blend front to back.
Separate a straight thin section of hair about two inches above the ear on the side, and clip the rest of the hair away. Take a 2-clip weft and secure the clip closest to your hairline first. Then secure the second clip closer to the back of your head. Repeat on the other side.
Release your remaining hair and you’re good to go!
How to Install Two 110g Sets of Clip-In Hair Extensions
Step 1: Start from the bottom
You’ll need: One 3-clip weft
We always start by clipping from the nape of the neck and moving upwards. To create your first section, use your index fingers to separate a small section of hair out, making sure to create an even part. The section should be long enough in width that the weft lines up with it perfectly, end to end. Secure the rest of your hair away with a clip.
Secure the width to the center of the section, starting with the middle clip. You should secure it as close to the root as possible. Once the middle clip has been clipped in, clip the left side and then the right, pulling the weft taught.
Pro tip: To make it easier and prevent clip sliding, pull the hair slightly away from your scalp to create leverage. You can also tease the hair to create a more secure base.
Step 2: Start row 2!
You’ll need: One 3-clip weft
Create your next section by creating a new straight part about half an inch above the first clipped weft. Secure excess hair away with a clip.
Take your next three-clip weft, and make sure it fits within the section. Secure by clipping in the middle clips, then the sides.
Pro Tip: To avoid bumps in the weft, slightly stretch the piece at the sides when you’re securing middle clips.
Step 3: Your first double row (aka row 3!)
You’ll need: Two 3-clip wefts
Create your next part and section about half an inch above your last weft, clipping away excess hair. Clip away excess hair.
You’re going to install two 3-clip wefts in this section. Secure the first from the middle of your head and pull it towards the left side of your face. Clip your two center clips in the middle of your section, and then secure the side clips.
Place the edge of your next weft beside the one you just installed. You want to clip across your entire head, without leaving gaps between the wefts. This weft should sit in line or just above the first 3-clip weft. Drag this weft from the center of your head towards the right hand side. Secure in place by clipping your two center clips in the middle of your section, and then secure the side clips.
Step 4: Creating a stacked row (aka row 4)
You’ll need: Two 4-clip wefts
Create your next part and section about half an inch above your last weft, clipping away excess hair. Clip away excess hair.
Place a 4-clip weft at the center of your head, securing the middle clips and then the outer clips. Take another 4-clip weft and stack it directly on top of the first one, again securing the middle clips, and then the outer clips.
Step 5: Your second double row (aka row 5!)
You’ll need: Two 4-clip wefts
Repeat the same process as Step 3, this time with two 4-clip wefts. This section should sit at the widest part of your head.
Step 6: Face framing
You’ll need: Four 2-clip wefts
Your last wefts go on the sides of your hair to boost volume and ensure a seamless blend front to back.
Create a small, thin section of hair about an inch above the ear on the left side of your head. Secure the rest of the hair away.
Take a 2-clip weft and secure it close to your hairline. Take a second 2-clip weft, and place this next to the first one, but closer towards the back of your head. Secure in place. Repeat this on the right side of your head.
Release your remaining hair and you’re good to go!